EzCAD settings to make deep engraving for metal
We are familiar to marking different fronts or image with laser marking machine, but actually, it can do more work.
Here let me show you how to set parameters to make Engraving with Depth by EzCAD.
First you need choose at least 30w and small F-theta lens (70*70mm or 110*110mm working area etc.). As we know, with same power, bigger working area and longer of focus length makes a weaker laser beam. We definetely need higher power, 50W is our minimum suggest, the bigger, the better.
We need set 2 layers to make engraving for depth with EzCAD laser marking machine.
First layer, let’s use pen No.0, and hatch as following: line space set to 0.03mm or even more smaller. Power we can set 90%, speed at 500mm/s or lower as you may test to find a best way for your materials.
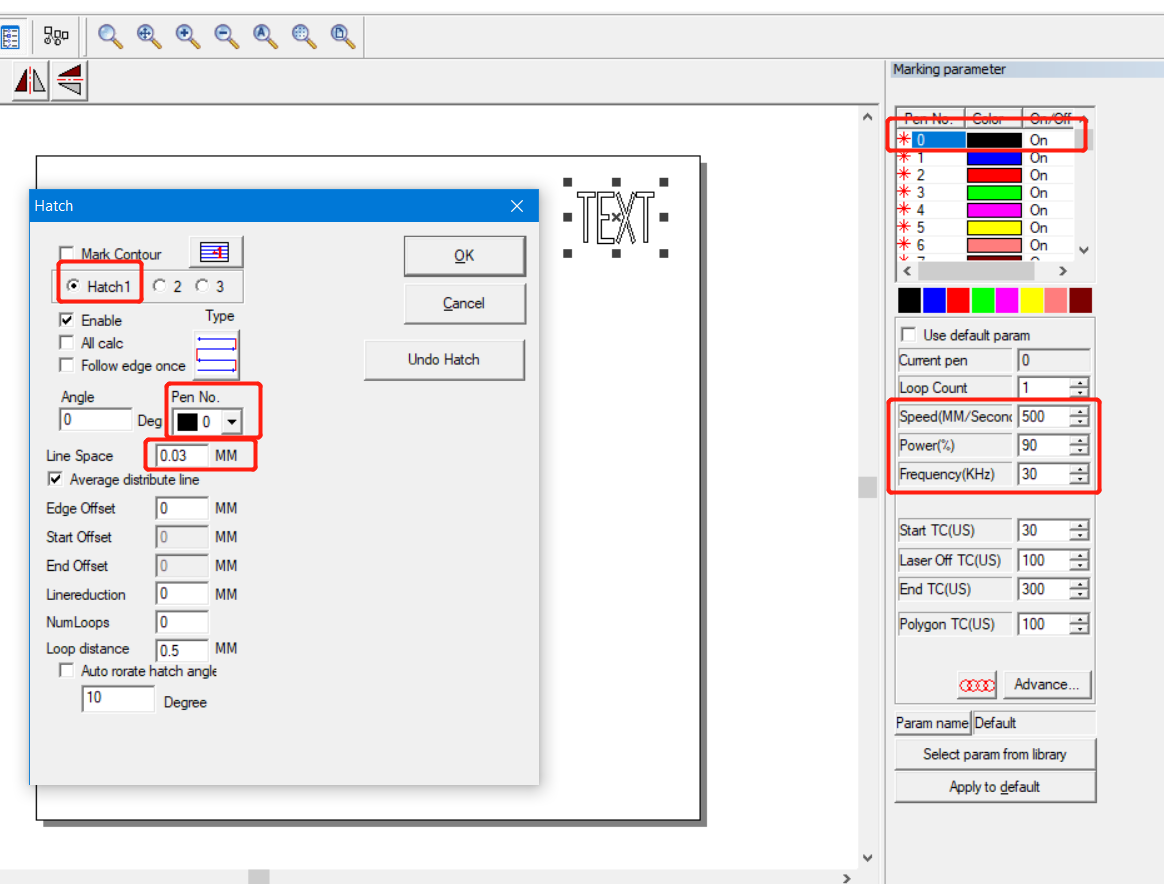
If we engraving with only 1 hatch settings, after several time, we will find there is no deepth because metal surface burned and metal powders gather and stays at surface of metal. Those metal powder prevent it going deeper. So, we need another layer setting in hatch 2.

As we can see, we need to set another hatch to clean the surface, then marking again. Cleaning don’t need high power. Parameters we can set line space 0.08mm or more, power 50% or as you may try, speed 1000mm/s or higher if your machine supports.
Further setting you may try for stainless steel or so:
Three hatches:
First hatch, 500 speed, 20khz, 90 power, circular hatch 1 loop;
Hatch 2, 500 speed, 20khz, 80 power, circular hatch 1 loop;
Hatch 3, 1500 speed, 60kHz, 80 power, line hatch 1 loop;